How to Read Api Documentation for Jquery Ui
Read Time: 45 mins Languages:
In this Nettuts+ tutorial, nosotros are going to larn how to create a dynamic content editing system using the jQuery UI Widget Manufacturing plant. We'll get over how to develop a logical, object orientated jQuery UI Widget, transform various nodes to editable text fields, delegate events within the widget framework, manage context, toggle icons, serialize data, and of class edit, restore and delete data using jQuery's fantastic AJAX functionality!


Creating a Widget Blueprint
The first thing nosotros'll do is set up a blueprint for our widget which we'll name "editable" and whose namespace will be "ui". The widget's proper name will be the first argument when calling the widget mill method. The 2d argument volition be an object literal containing the various properties and methods for the widget itself. It's a very simple, make clean and efficient way to churn out plug-ins. There are a number of inherent props and methods to a UI widget. We'll be using the following vanilla $.widget props:
-
Options{...}
This object literal is the only property of our widget that will exist exposed to users. Here, users volition be able to laissez passer their own arguments to the widget which will, of grade, override any default options we specify. Examples include callbacks, element selectors, element classes etc.
-
_Create()
This is the commencement method called during the widgets initialization and information technology'south only called one time. This is our "set" method, where we'll create / manipulate elements in the DOM as well as bind event handlers.
-
_Destroy()
This method is the only our widget's but public method in that users can specify "destroy" equally an statement to calling the widget. This method is used to tear downwardly / destroy an instantiated widget. For case, nosotros'll be using destroy to remove whatsoever HTML generated by our widget, unbind event handlers and of course, to destroy the instance of the widget relative to the element information technology was called on.
Here's What We'll Be Using:
$.widget("ui.editable", { options: {}, _create: function(){}, destroy: part(){} } Take notation of the underscore which precedes the _create method. Underscores denote a private / internal method which is not accessible from outside the widget.
For more than information on UI Widget development, equally well as the other inherent methods such as _trigger(), _getData(), _setData() and so you lot can check the following great resources:
- jQuery UI Widget Factory Evolution Wiki
- jQuery UI API Developer Guide
- Tips for Developing jQuery UI 1.8 Widgets by Eric Hynds
- jQuery UI Widget upgrade guide for jQuery ane.eight
- jQuery Forums - A groovy postal service past Richard D. Worth, Project Lead for the jQuery UI and a brilliant developer, contrasting and explaining the _init and _create, methods and their uses.
Brainstorming: What Methods Do We Need? What Does Our Widget Need to Do?
As we're creating a content editing widget we'll apparently need some manner to edit content. Additionally, we'll want the ability to delete content as well as abolish revisions. We'll also need "edit" triggers, say icons which, when clicked, volition toggle the land of our content as well as toggle state between default and editor icons. With this functionality in mind, let's define some general methods at present:
-
_CreateEditor()
Typically, information technology's good to split up logic in a logical, clean easy to read manner. Although nigh of the DOM creation and insertion can be washed within the _create() method itself, since we'll be creating editors for multiple sets of content (i.due east. table rows) allow's utilize an independent method which nosotros can phone call from a for loop! The _createEditor() volition be called to handle the cosmos and insertion of the core editor elements. This separation of logic should make the widget easier to empathize at a glance as well as help us maintain our lawmaking down the road.
-
_ClickHandler()
This method speaks for itself, it's the handler which volition exist used when the user clicks on ane of our "editor" icons. Although nosotros could demark a handler to each private icon type let'southward simply use a single handler and a instance switch to telephone call appropriate methods based on which icon was clicked. There are minor benefits and drawbacks to bounden a single handler for all icons and individual handlers for each icons so it'due south actually simply a matter of preference and performance.
-
_ShowIconSet()
This is the method will be used to change our icons from their "default" state to their "editor" country. As mentioned above, we'll desire the ability to edit / delete an detail as well as save / cancel changes. We only need to brandish 2 icons at whatsoever given fourth dimension (edit/remove and salvage/cancel, respectively) and so this method will toggle our icons betwixt those ii states.
-
_TransformElements()
Here'south where the core logic of transforming elements back and forth from their original state to editable fields takes and vice versa. This method will exist used when we make elements editable, save changes or cancel a modify. This method will also exist responsible for populating / repopulating the element / input with the relevant text.
-
_RemoveElements()
This method will be responsible for removing elements from the DOM when an detail is deleted by the user.
-
_Encode()
As we'll be saving / deleting data with jQuery's powerful AJAX functionality, we'll need a way to convert these text nodes and class inputs, along with their corresponding "field names", into a standard URL-encoded string. As such, this method will handle the serialization of text / input values.
-
_Post()
This method will handle all of our AJAX logic. It will be responsible for both saving and deleting data and it's callbacks volition be used to update the DOM when appropriate. Additionally, any user divers AJAX callbacks will be fired from here every bit well.
Here'southward a Look at Our Widget's Blueprint Then Far:
$.widget("ui.editable", { options: {}, _create: function(){}, _createEditor:office(){}, _clickHandler: function(event){}, _showIconSet: part(){}, _transformElements: function(){}, _removeElements: function(){}, _encode: function(){}, _post: office(){}, destroy: function(){} }); Above, detect that nigh all of our methods are preceded with an underscore. The underscore denotes a individual method which means that whatsoever property or method preceded by an underscore will not be accessible from outside the widget. There's not much demand to make any of our methods public, so we'll proceed them with an underscore.
Full Screencast
Options, Options and More Options!


Now, let's ascertain some user overridable options for our widget! This is e'er a fun stride as there are a plethora of really interesting and smashing things that tin can be washed here. For instance, creating callbacks. Nosotros tin create optional callbacks for virtually anything, saving data, deleting data, errors, success, completion, events etc. Additionally, we can easily define the context of these callbacks. So, want to animate the color of a row subsequently a successful update? No problem! Want to have each field blink in rapid succession as a visual confirmation? Easy equally pie! This, for me, is one the near fun and powerful features of any given widget. The ability to mold information technology'south functionality and interactivity to adapt the users needs.
Additionally, nosotros'll also be defining some of import cadre options such a selector for those elements we want to make editable, where we desire to insert our icons, custom class names as well as some other AJAX options. Here's a look at our options which is an object literal:
<potent>options: {...}</strong> Some General Options
Here, nosotros'll define some core options for our widget such as chemical element selectors, form names, field names and so on...
-
Elements:
This will exist a selector string for those elements we want to make editable. Nosotros'll utilize a selector for table cell elements
"td"every bit the default selector. This can be overridden, though. Whatever valid jQuery selector string would work. For example:- "td"
- "td>small"
- ".editable-content"
- ".editable p"
- "div:has(p)"
For more data on jQuery selectors, see the jQuery Selectors API
-
elementParent:
Hither, we'll permit the user to define a selector which volition server as the parent container for sets of editable content. Yous could virtually retrieve of this as sort of pseudo fieldset used to group inputs together or even a tabular array row which groups cells together. This is useful if the user wants to make something other than tabular array rows editable.
As such, this selector is very of import. We'll be looping through each
elementParentwhile creating, appending, binding, and caching elements! Every bit with theelementsbelongings, any valid jQuery selector will work here within the context of the element upon which the widget was called. As a default value, we'll usetbody trto select all of the table rows within the table body.Note: In case your wondering why we don't specify the parent container by doing something like this:
this.chemical element.parent();
Consider that the immediate parent of the element may not be the common parent of all the editable nodes for a given row / block. What if the nodes were editing are nested within another chemical element? Past specifying an implicit parent container we know that we are dealing, specifically, with the appropriate top level container for all of the editable content within a given row / block.
-
insertMethod:
Here, we'll allow the user to define which jQuery insert method volition be used for appending the icons and their container. A valid jQuery insert method cord, such every bit
appendTo,prependTo,insertBeforeorinsertAftershould exist specified here. The default insert method will beappendTo. -
Classes:
Allowing the user to specify their own / boosted grade names opens upward a slew of new possibilities such as using a css framework, like the jQuery UI CSS Framework, or peradventure icon classes from an paradigm sprite they've created! Here, the user can specify additional grade names, every bit a string, for a number of different elements. We'll fix some default classes for the icons using jQuery UI Themeroller icon classes. So,
classeswill be an object literal with backdrop every bit follows:- iconContainer: A space separated cord representing boosted classes for the parent element of the icons
- edit: A space separated string representing additional classes for the edit icon
- remove: A space separated string representing additional classes for the remove icon
- save: A infinite separated cord representing additional classes for the save icon
- cancel: A space separated string representing additional classes for the cancel icon
- th: A space separated string representing additional classes for the table header element which volition exist created conditionally
For more information on the jQuery UI Themeroller CSS Framework see the jQuery UI Themeroller API every bit well equally the jQuery UI Themeroller
-
fieldNames:
This option will be a simple assortment of representing the numerically indexed field names of the content which is being made editable. So, for example, if the editable content represents "terminal-name", "get-go-name" and "accost" fields, we would specify those field names in chronological order, the order in which these items are displayed in the DOM, from first to last, ["final-proper name","first-name""address"]. For instance:
fieldNames: ["last-proper name", "start-name", "address"]
We'll initialize an empty array every bit the default value.
fieldNames: []
-
Action:
This option will is an object literal used to specify the pseudo
actionbelongings for our AJAX requests. In simpler terms, information technology will contain the url strings to which jQuery's$.ajaxwill submit. It will incorporate ii backdrop:-
Edit:
The url string used when editing content.
-
Remove:
The url cord used when deleting content.
As default values, nosotros'll use javascript'southward
location.hrefholding which is the url of the current page:activity : { edit : location.href, remove : location.href } -
-
ajaxType:
This string will decide the type of
$.ajaxrequest we'll apply. The default method is ismail servicebut the user can specify something else should the need arise.
Callbacks
Hither, we'll define some empty functions / placeholders for user defined AJAX callbacks...
-
Create:
This optional callback will be called at the stop of the
_createmethod in the context ofthis.chemical element. -
Destroy:
This optional pre-callback will be called at the beginning of the
destroymethod as well in the context ofthis.element. -
ajaxBefore:
This optional callback will be called before an AJAX request begins in the context of the editable contents shared parent. This tin be used for a number of things, such as, for example, displaying an AJAX loader gif.
-
ajaxError:
This optional callback will be chosen if there is an error in the AJAX request in the context of the editable contents shared parent. With this callback, you give some feedback back to the user letting them know that their post did non consummate.
-
ajaxSuccess:
This optional callback will be called, again in the context of the editable contents shared parent, if there is AJAX call request successfully. This can, as above, be used for a number of different things such every bit letting the user know the request was a success.
-
ajaxComplete:
This optional callback volition be called when AJAX request is complete - regardless of success or fault also in the context of the editable contents shared parent. This could, for example, be used to remove an AJAX loader gif signifying the asking is complete.
Let's Have a Look at the Widget Now That Nosotros Have Our Options Divers:
$.widget("ui.editable", { options: { elements : "TD", elementParent : "TBODY TR", insertMethod : "appendTo", classes : { iconContainer : "", edit : "ui-icon ui-icon-pencil", remove : "ui-icon ui-icon-closethick", save : "ui-icon ui-icon-check", cancel : "ui-icon ui-icon-arrowreturnthick-1-due west", th: "" }, fieldNames : [], ajaxType : "postal service", action : { edit : location.href, remove : location.href }, create : null, destroy : null, ajaxBefore : null, ajaxError : null, ajaxSuccess : null, ajaxComplete : aught }, _create: role(){}, _createEditor:function(){}, _clickHandler: role(event){}, _showIconSet: function(){}, _transformElements: part(){}, _removeElements: function(){}, _encode: office(){}, _post: part(){}, destroy(){} }); Creating, Appending, Binding and Caching With the _Create Method!


Having divers the blueprint of our widget, as well as it'southward options, our adjacent pace will exist to _create the widget itself! This method is called merely once, at the widgets initialization.
In the _create method, we'll kickoff ascertain a number of internal props (read: properties) to be used later, within the widget. Essentially, we'll be caching selectors and booleans as well as defining class names and such. Then, we'll proceed to element creation, insertion and caching besides as adding classes and binding an event handler.
<stiff>_create: function(){}</strong> Defining Some Properties
As mentioned above, the kickoff step in _create will be to define some backdrop. Let's get through them, ane at a time:
-
this._element:
This property will be the jQuery selector representing the element which was used to instantiate the widget
this._element = $(this.chemical element),
-
this._table:
This boolean holding will use a ternary operator to determine if
this._elementis a table. If this property evaluated to truthful, later on, nosotros'll create a table header chemical element so that the number of columns in thetheadandtbodycorrespond.For more data on ternary / provisional operators come across the Mozilla Developer Network or MDN for brusk
this._table = (this._element.is('table') ? true : simulated);Note: Rather than using a ternary here we could have only used the "this._element.is('table')" expression equally it returns a boolean value. It's better to just enshroud the boolean here rather than repeatedly calling the
ismethod. This is also a lot more readable. -
this._elementParent:
Using jQuery selector string from the options argument, nosotros'll cache a jQuery selector for the editable contents shared parent element within the context of
this._elementthis._elementParent = $(this.options.elementParent, this._element),
-
this._editable:
Here, we'll initialize an empty assortment which volition, shortly, be populated with jQuery collections of editable content relative to the alphabetize of their parent container. The array key volition direct correspond to the index of the parent element. In other words,
_editable[0]will exist the jQuery drove of all editable content within_elementParent[0]. This is a nifty / speedy way to cache editable collections for utilize later on.this._editable = [],
-
this._triggers:
This will exist an object literal containing the "action" classes for our editor icons. I call them activeness classes equally these classes will be used to decide what action should be taken in our issue handler.
In defining these classes, we'll apply another property provided by widget framework,
this.widgetBaseClass. This belongings always returns a base class for the widget, which, in this case, will existui-editable.And so, essentially, we'll concatenate the
widgetBaseClasswith appropriate grade names for each of our icons. These triggers classes are independent of any other classes the icons may have. Although they may be used to style the icons with css, they are primarily used in our event handler.For more than information on string concatenation see the Mozilla Develops Network.
this._triggers = { edit : this.widgetBaseClass + "-edit", remove : this.widgetBaseClass + "-remove", salvage : this.widgetBaseClass + "-salvage", cancel : this.widgetBaseClass + "-cancel" }, -
this._classes:
Not unlike the
_triggersproperty above,this._classeswill too be an object literal of form names. The departure here is that_classeswill contain a chain of predefined and user defined class names.Using a ternary operator, we'll concatenate base classes with whatever optional classes specified in the
options.classesprop.this._classes = { editable : this.widgetBaseClass + '-element', iconContainer : this.widgetBaseClass + "-icons" + (this.options.classes.iconContainer ? " " + this.options.classes.iconContainer : ""), tableHeader : this.widgetBaseClass + "-header" + (this.options.classes.th ? " " + this.options.classes.th : ""), edit : this._triggers.edit + (this.options.classes.edit ? " " + this.options.classes.edit : ""), remove : this._triggers.remove + (this.options.classes.remove ? " " + this.options.classes.remove : ""), salvage : this._triggers.save + (this.options.classes.save ? " " + this.options.classes.save : ""), cancel : this._triggers.abolish + (this.options.classes.abolish ? " " + this.options.classes.cancel : "") },
Adding Classes to the Editable Content
Now that we've divers a number of properties, nosotros're ready to add the appropriate class to our editable content.
This stride is as simple as uncomplicated can be. We'll use a jQuery selector for all of the editable content in the context of this._elementParent. We'll ascertain the selector with the cord given to united states of america in the options.elements argument. Then, using jQuery'southward addClass method, we'll add the class name we cached a moment ago in the _classes object.
-
$(this.options.elements, this._elementParent).addClass(this._classes.editable);
For more information on jQuery's addClass method meet the jQuery API
Creating Our Editor and Binding Away!
The icons and their containers volition be created equally nosotros loop through our _elementParent drove.
In other words, each _elementParent will accept it's own set up of icons.
We'll also enshroud selectors, in context, for these icons, their container as well as the editable content relative to the electric current _elementParent in the loop.
-
A Few Variables for the Loop
Before we being our
for(){...}loop, nosotros'll initialize a variable for the initial expression, which is the iterator which is incremented is the loop. Nosotros'll then ascertain an integer representing how many elements are buried in the_elementParentcollection, using jQuery'ssizemethod.var i, total = this._elementParent.size();
For more information on
forstatements run into the Mozilla Developers Network
For documentation of the jQuerysizemethod see the jQuery API -
Caching and Creating the Icons and Their Container:
We'll be populating the empty
_iconContainerarray here past assigning the render value of the_createEditormethod to it as a new prop,i. As you'll see, momentarily,_createEditorvolition return the jQuery selector for the newly created icon container.And then, since
iis the equal to the index of the current_elementParentin our loop,_iconContainer[i]will be the container for our icons within_elementParent[i]only!Every bit we iterate, we'll be using the iterator,
iequally the array key for several jQuery collections including the_editablearray, the_iconsarray too equally the_iconContainerarray.this._iconContainer[i] = this._createEditor(i);
Note: The array keys for the
_editable,_iconContainerand_iconscollections will always stand for to the index of the_elementParentin the current iteration of theforloop. -
Caching an Editable Selector in Context
In like manner to the
_iconContainerarray, we'll now cache a selector for all editable content in the context of_elementParent[i].We'll define the editable content's selector string by concatenating a
.with the advisable course name stored in our_classes.editableprop.this._editable[i] = $('.' + this._classes.editable, this._elementParent[i]); -
Binding an Event Handler to Our Icons
The last thing nosotros'll do in our
forloop is bind a handler to the click event of our newly created icons. As were binding a handler within the context of a jQuery UI Widget / Object, we'll need to pay special attention here as the context ofthisin a typical jQuery effect handler, refers to the element which received the effect. This is one of jQuery's nicest features as it standardizes whatthisis across all browsers. (I'm lookin at you IE ;)And so, here are two unproblematic approaches to handling context inside a widget event handler.
-
event.information
First and foremost, we can simply pass this instance of our widget to the handler as an
effect.informationargument which is provided by some of the diverse jQuerybindtype methods. Essentially, the second argument, which proceeds the function call, tin exist an object literal of data we desire to laissez passer to the handler. In the handler, this data is accessible in theeventobject equally theissue.dataproperty! Hither's how it looks:this._icons[i].demark('click', {widget:this, i:i}, this._clickHandler);So,
effect.information.widgetwill be a reference to our widget instance andevent.data.iwill exist a reference to our iterator!Passing an event.data argument is neat when you don't want to modify the context of
thiswithin your handler. Additionally, it doesn't require some other function call as the next method,$.proxy, does. -
$.proxy()
Equally stated in the jQuery API, "This method is most useful for attaching event handlers to an element where the context is pointing back to a different object."
In other words, by proxying our widget to the handler,
thiswill refer to our widget instance rather than the chemical element which received the outcome.Fifty-fifty though the target chemical element would no longer be assigned to
this, it would all the same exist attainable in jQuery'seventobject as theevent.targetproperty. Equally many developers are already in the addiction of caching a selector for$(this)in event handlers, it wouldn't be to much of a stretch to cache an$(event.target)selector instead.Without further adieu, here'southward the $.proxy method in action:
this._icons[i].bind('click', $.proxy(this, this._clickHandler);
-
-
Binding a handler using the
event.datastatementWith an agreement of both
event.dataand$.proxy, permit's employ theevent.dataargument to pass our widget and iterator forth to the handler.this._icons[i].bind('click', {widget:this, i:i}, this._clickHandler);
Permit's accept a look at the logic of our for loop now, in its entirety:
var i, full = this._elementParent.size(); for(i=0; i<total; i++){ this._iconContainer[i] = this._createEditor(i); this._editable[i] = $('.' + this._classes.editable, this._elementParent[i]); this._icons[i].bind('click', {widget:this, i:i}, this._clickHandler); }; What Nigh Table Headers?
With the icons created, inserted and bound we'll need to brand a minor aligning if this.chemical element is a table.
Although nosotros haven't divers the _createEditor method all the same, the blazon of icon container element it creates is relative to what this.element is.
So, if were working for a tabular array, it will create a td and append it to the table. If were working any other blazon of element, it will create a div.
Equally such, appending another td to a tabular array row leaves us with an incomplete table caput equally there will be more tables cells in the torso than at that place are table headers in the head.
Then, we'll need bank check if this.chemical element is a table or not and if information technology is we'll create, populate and append, using the insertMethod specified in the options argument, a th element. Although creating DOM elements with jQuery is simple and clean I sometimes like to write it out in obviously javascript. Permit'due south take a look at the logic:
-
Checking for a Table
First, we'll check our
tableproperty which, equally you may remember, is a boolean representing whether or notthis.elementis a table.if(this._table){ } -
Information technology It'due south a Table, Create a Header!
If
this.chemical elementis a table, we'll demand to create and append a newthto the tabular array head's offset and hopefully just table row, here'south how we'll practise it:-
Creating the table header
If
this.elementis a table, we'll create a newthelement equally the variableth.if(this._table){ var th = document.createElement('th'); } -
Giving it some class!
Next, we'll ready the
classNameproperty for this element as thetableHeaderclass name specified in the_classesobject.if(this._table){ var th = document.createElement('thursday'); th.className = this._classes.tableHeader; } -
Setting the
innerHTMLof the the table headerThen, we'll set the
innerHtml, which in this case is just text, of this element.if(this._table){ var th = document.createElement('th'); thursday.className = this._classes.tableHeader; th.innerHTML = "Edit"; } -
How about a little
style?We'll specify one css rule,
text-marshalascenter. This volition eye the header text and look prissy as the icons themselves volition also exist centered via css.if(this._table){ var thursday = document.createElement('thursday'); th.className = this._classes.tableHeader; th.innerHTML = "Edit"; thursday.style.textAlign = "centre"; } -
Appending the table header to the tabular array head
Lastly, using the jQuery insertMethod specified past the user, nosotros'll dynamically insert the element into the tabular array header of our table. Have note of our DOM insertion:
if(this._table){ var thursday = certificate.createElement('th'); th.className = this._classes.tableHeader; thursday.innerHTML = "Edit"; th.style.textAlign = "center"; $(th)[this.options.insertMethod]('thead tr:first', this._element) }Did you notice that we have our insert method in foursquare brackets correct after the jQuery selector?
You may exist wondering what this is or how it works. Basically, think of jQuery as one big (awesome) object. As an object, you can use associative array / square bracket style note with it! This shorthand allows us a peachy deal of flexibility in calling methods dynamically based on relative weather!
-
How About a Callback!
The last thing nosotros'll do in the _create method is phone call the user divers create callback if it'southward been specified.
In that location are a plethora of reasons to use a callback in the _cerate method. Here'south one case!
Let'southward say the user, with a success callback, is changing the color of tabular array cells to reflect a successful update. Should the widget exist destroyed, they'll need some way to restore the colour of their table cells. Of course, they could implicitly set the colour manually in the destroy callback simply how about saving the tabular array jail cell color using jQuery'south $.information method which is a much more than dynamic approach! That information would be attached to this.element equally that will exist the context of our callback.
create: role(){ var color = $("td", this).css("color"); $.data(this, "color", color); } Thus, when the widget is destroyed, the user could simply gear up the colour back to it's default value by accessing the appropriate $.data
destroy: function(){ var color = $.data(this, "color"); $("td", this).css("colour", color); } Widget Callbacks Explained
Every bit user defined callbacks are optional, their default values will always be fix to null.
As such, we'll employ jQuery'south isFunction method to decide if the callback's blazon is function and and so call it if information technology is.
Alternately, nosotros could apply javascript's native typeof operator to determine if the typeof callback is a role. Nosotros'd have to enclose the typeof operator in parens so that nosotros could have information technology'southward return value and convert information technology lower case, using javascript's native toLowerCase method, and then as to standardize the output. Information technology'due south much simpler, though, to use jQuery's isFunction method but here's a expect at this technique in vanilla javascript:
-
if((typeof this.options.create).toLowerCase() === "function"){...}
Here'south the how we'll exercise it with jQuery:
if($.isFunction(this.options.create)) this.options.create.call(this.element);
So, if the callback is a role, we'll execute information technology using javascript's native telephone call method.
The phone call method allows us to specify the context of our callbacks. In other words, it will define what this refers to within the callback part.
As such, we'll utilize this.chemical element as the context here which will define this as the the element to which our widget was instantiated.
Within the _createEditor Method


In the previous department we discovered the logic of how we'll create elements. Now, allow'due south a have a look at the implementation. The _createEditor method will exist called from within the _create methods for loop to do all the element creation and insertion relative to the index of the current _elementParent in the loop.
<strong>_createEditor: part(i){}</potent> Arguments
The _createEditor method takes one argument, i, which is equal to the alphabetize of the current _elementParent from the _create methods for loop.
Initializing a Few Variables
The first affair we'll exercise here is initialize a few variables which we'll use in our chemical element creation. We'll a initialize a variables for the edit icon as well as the remove icon.
var edit, remove;
Creating Our Icons
With these variables initialized, permit's go ahead and create our icons using some elementary javascript! Essentially, we'll utilise the same techniques as we used for the conditional table header but with one exception. Rather than setting the innerHtml of the link we're creating, we'll be setting the championship attribute instead. This manner, on mouseover, the user we'll come across a tooltip description of what the icon does! Here's a look at our anchor / icon creation:
edit = document.createElement('a'); edit.className = this._classes.edit; edit.title = 'Edit'; remove = certificate.createElement('a'); remove.className = this._classes.remove; remove.championship = 'Remove'; Creating the Icon Container
With the icons prepare to go, nosotros'll need to create a container for them. The element blazon of this container will depend on whether or not we're working with a table. So, using the _table boolean nosotros divers in the _create method and a ternary operator we'll create a td chemical element if nosotros're working with a table and div element if we're working with anything else. Then, we'll set the container'due south className using the _iconContainer class we defined in the _classes object.
_iconContainer[i] = document.createElement( (this._table) ? 'td' : 'div'); _iconContainer[i].className = this._classes.iconContainer;
Caching a Selector for Our Icons
We'll now brainstorm populating the _icons assortment with a jQuery selector for the newly created icons, we'll pass these icons along as an array.
The array key for this collection will be i, thus _icons[i] will correspond all of the icons contained in _elementParent[i].
this._icons[i] = $([edit,remove]);
Returning the Icon Container Afterward Setting Its HTML and Appending It to the DOM
At present, nosotros'll chain a few jQuery methods together in order to set the html of _iconContainer[i] and suspend it to the DOM.
First, using jQuery'south html method, we'll set the html of the _iconContainer[i] to this._icons[i].
Next, with our icons appended to the _iconContainer[i], we'll append it to the DOM, dynamically, using the options.insertMethod string in square subclass / associative assortment notation.
Lastly, as most jQuery methods return the bodily jQuery selector existence used in the expression itself, this expression volition return $(iconContainer[i]).
Thus, this._iconContainer[i] which is existence defined in the _create method's for loop, will equal $(iconContainer[i]).
render $(_iconContainer[i]).html(this._icons[i])[this.options.insertMethod](this._elementParent[i]);
For more than information on returning values from a function, check the Mozilla Developers Network
Documentation of the jQuery html method can be found in the jQuery API
Our Widget'south Event Handler, the _ClickHandler Method


With our widget instantiated and set to go information technology's at present time to handle it'south beliefs. The logic of this widget is such that the click handler volition serve as a sort of "controller" in that it volition determine what action is to be taken based on the class of the icon which received the click.
In other words, if the users clicks an edit icon, the handler volition bank check the icons form and and so telephone call the advisable edit functionality of the widget, and so on...
<strong>_clickHandler: function(event){}</strong> Arguments
The _clickHandler method takes one statement, event. By specifying an empty statement here, jQuery volition automatically assign the event object to this statement. The event object contains a number of very useful properties such every bit target, timeStamp, preventDefault and stopPropagation to proper noun a few. Nosotros'll exist using a couple of these props / methods in our event handler.
Preventing Default Behavior
The commencement affair we'll do in our event handler is call the preventDefault method of the jQuery event object. This method volition prevent any default actions from occurring every bit a outcome of the event. What this means for the states is that when a user clicks one of the icons, which is really an anchor, preventDefault will cease any blazon of navigation / scrolling from being triggered - pretty dandy eh?
consequence.preventDefault();
Defining a Few Variables
Get-go, we'll cache a jQuery selector for this, which is, of form, the element which received the outcome.
Adjacent, nosotros'll define the variable i which was passed to our handler in upshot.data This was the iterator used in the _create method'due south for loop to cache selectors for various elements relative to _elementParent[i].
We'll then define the variable widget by assigning evet.information.widget to it which is a reference to the current instance of our widget.
Now, nosotros'll ascertain a sort of shortcut variable, triggers as the widget._triggers holding. This property contains all of our icons trigger classes which we'll exist using to determine what deportment to accept.
Lastly, we'll initialize the variables, information and inputs. These vars volition only exist used when we need to serialize data for AJAX requests.
var target = $(this), i = outcome.data.i, widget = event.data.widget, triggers = widget._triggers, data, inputs;
Determining What to Do With a Case Switch
The switch statement is very much like an if statement in that it evaluates an expression and simply executes certain code if the status is met. In some circumstance, it may exist cleaner / easier to read. There are, even so, various benefits and drawbacks to either statement but either would be advisable given the proper weather condition.
We'll exist evaluating four weather based on the switch statements label which nosotros'll set up as true. We are going to bank check the icon's grade using jQuery'southward hasClass method which returns a boolean. If the icon has the class name specified in the argument, it will return true.
switch(true){ example(target.hasClass(triggers.edit)): pause; example(target.hasClass(triggers.remove)): break; case(target.hasClass(triggers.save)): break; case(target.hasClass(triggers.cancel)): pause; default: break; }; Equally you can run across, this a clean, readable way to evaluate which icon was clicked. Obviously, there are a number of different ways to exercise this and an if statement would piece of work merely as well. Now, let's have a closer look at each case and what we'll be doing!
-
The Edit Icon
If the edit icon has been clicked we need to, outset, toggle the default icons, which are "Edit" and "Remove" to the editor icons which are "Save" and "Cancel". So nosotros'll call the
_showIconSetmethod.You lot may recollect this method from the widget blueprint we created earlier. Although we haven't defined it however, it takes two arguments,
iwhich will be used to select the icons we'll toggle andeditor. Theeditorstatement specifies which iconset to prove, default or editor.In one case we divers more of our widget's methods, you'll see that most of them autumn into line with jQuery in that they usually
return this. As a result, we chain most of these methods together. Then, let's add another method to this expression,transformElements.transformElementsis sort of a workhorse in that it's responsible for making content editable, restoring content to it'southward previous country as well equally updating content that'south been edited. This method takes two arguments too,i, which, once more, we'll be used to select the appropriate_editabledrove and i,blazonwhich will define the blazon of "transformation". Here's a wait:case(target.hasClass(triggers.edit)): widget._showIconSet(i, "editor")._transformElements(i, "edit"); pause;
-
The Remove Icon
If the remove icon has been clicked, we'll need to remove this editable content both from the DOM as well as from the database.
We volition, of form, be using an AJAX request to delete this detail from the database just since we're not submitting a form here and we don't really have whatsoever inputs, which are automatically serialized on submission, nosotros'll need a way to serialize / encode the text of these elements into a valid url string.
So, nosotros'll phone call our widget'due south
_encodemethod to serialize this data. We'll laissez passer i argument to_encode, the jQuery selector for the elements to be removed._encodevolition serialize the text of those elements for u.s.a. and return the a valid url string. And so, we'll define the variabledataas this value.Lastly, nosotros'll call our widget's
_postmethod which will submit an AJAX request to the server. We'll laissez passer 3 arguments to_post, the serialized data, a variable which indicates whether we're saving or deleting data andi, which will be used in the$.ajaxsuccess callback to actually remove the deleted elements from the DOM.instance(target.hasClass(triggers.remove)): data = widget._encode(widget._editable[i]); widget._post(data, "remove", i) break;
-
The Save Icon
If the save icon was clicked, we'll need to serialize our inputs, as nosotros did above, using the
_serializemethod. So, nosotros'll need to phone call our widget'due south postal service method in order to submit the AJAX request to the server.Every bit such, we'll define ii variables here,
inputsandinformation.inputswill be defined as the jQuery collection of inputs within the context of this element andinformationwill be thereturnvalue from the_encodemethod, just as to a higher place.Finally, we'll telephone call the
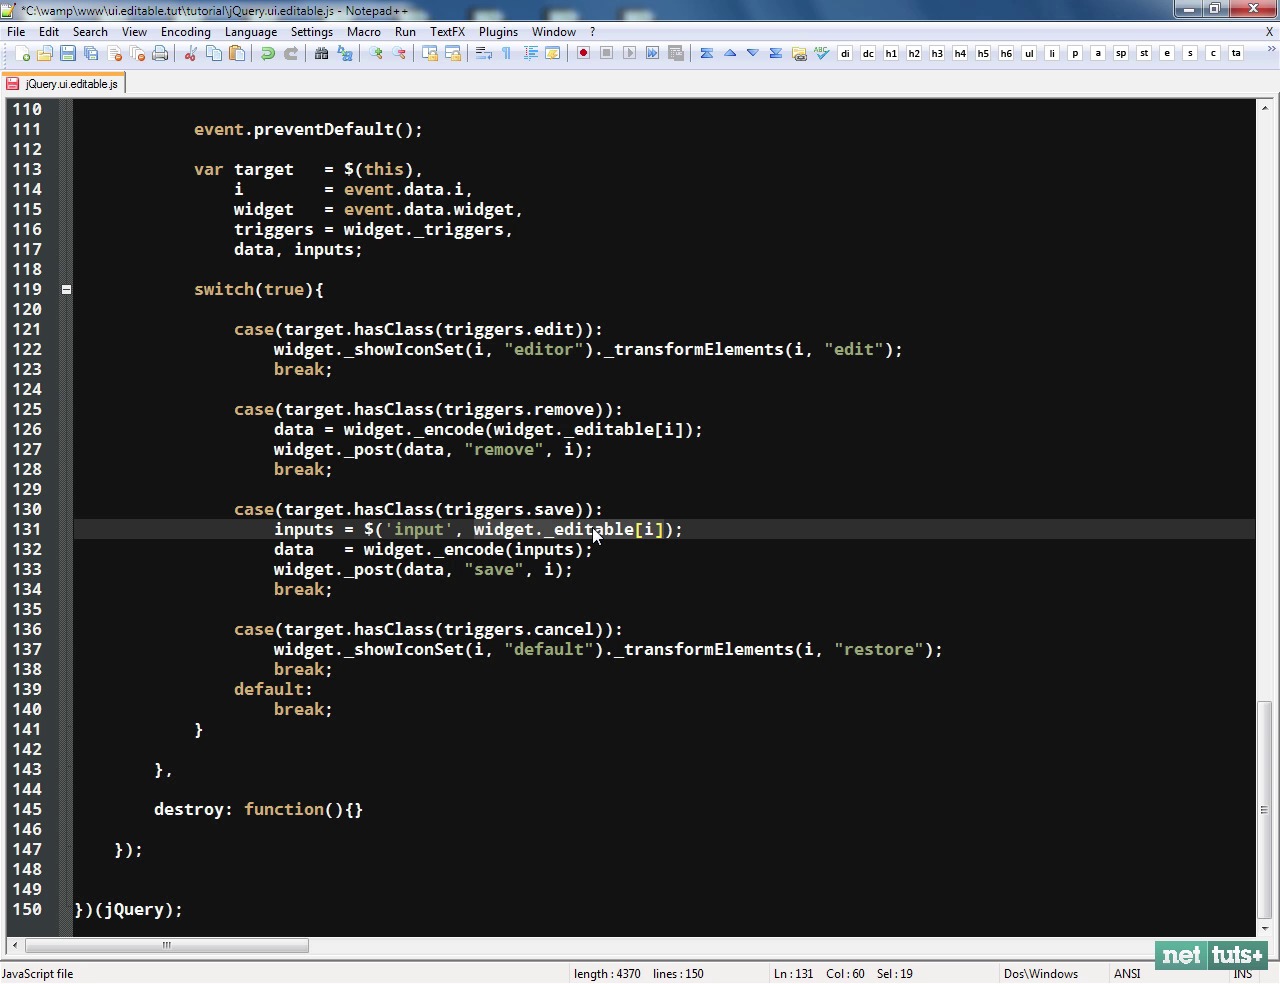
_postmethod with it'south three arguments, the serializeddata, the type of post we're making (in this case, "save") andiwhich is used in the$.ajaxsuccess callback to update the appropriate elements in the DOM.instance(target.hasClass(triggers.salve)): inputs = $('input', widget._editable[i]); data = widget._encode(inputs); widget._post(data, "save", i) break; -
The Cancel Icon
Finally, if the cancel icon has been clicked, nosotros'll restore the icons and editable content back to their default states.
To do this, we'll first call the
_showIconSetmethod with two arguments,ianddefault.ivolition exist used to select the appropriate drove from our_iconsassortment anddefaultspecifies which icon set to show.Adjacent, we'll chain the
_transformElementsmethod to this expression with one argument,i, which, every bit usual, is used to select the appropriate collection from our_editablearray.case(target.hasClass(triggers.abolish)): widget._showIconSet(i, "default")._transformElements(i, "restore"); interruption;
Note: If you're not exactly sure as to what's going on in the methods nosotros're calling, it'southward ok. We haven't defined these methods yet and so there'south no reason you really should empathize yet. Hang tight, we'll be defining these methods shortly.
-
The Total Switch Argument
switch(true){ example(target.hasClass(triggers.edit)): widget._showIconSet(i, "editor")._transformElements(i, "edit"); intermission; case(target.hasClass(triggers.remove)): data = widget._encode(widget._editable[i]); widget._post(data, "remove", i); break; case(target.hasClass(triggers.save)): inputs = $('input', widget._editable[i]); information = widget._encode(inputs); widget._post(information, "salvage", i); pause; case(target.hasClass(triggers.abolish)): widget._showIconSet(i, "default")._transformElements(i, "restore"); break; default: break; }
That'southward It for the Click!
Hither's how the complete _clickHandler method looks at present that nosotros've defined it:
_clickHandler: function(event){ event.preventDefault(); var target = $(this), i = event.information.i, widget = effect.information.widget, triggers = widget._triggers, data, inputs; switch(true){ example(target.hasClass(triggers.edit)): widget._showIconSet(i, "editor")._transformElements(i, "edit"); interruption; instance(target.hasClass(triggers.remove)): information = widget._encode(widget._editable[i]); widget._post(data, "remove", i); interruption; example(target.hasClass(triggers.salve)): inputs = $('input', widget._editable[i]); data = widget._encode(inputs); widget._post(data, "save", i); intermission; case(target.hasClass(triggers.cancel)): widget._showIconSet(i, "default")._transformElements(i, "restore"); break; default: suspension; } } Toggling the Icons To and Fro!


In our upshot handler, we telephone call the _showIconSet method whenever we need to toggle icon state betwixt editor and default. This is the method responsible for making those changes.
The _showIconSet method, step by step!
Taking advantage of jQuery'south awesome chaining adequacy, allow'southward take a look at how we tin can alter icon state with merely one variable and statement!
-
Var Titles
Showtime off, were going to ascertain a new variable,
titlesas an array, using a ternary operator.This variable volition incorporate the title attributes for our icons.
We'll bank check the
iconSetargument to make up one's mind which icons nosotros're displaying and the populate the array with the appropriate titles accordingly.var titles = (iconSet === "default") ? ['Edit','Remove'] : ['Save','Cancel'];
-
this._icons[i]
Now, using
inosotros'll select the appropriate element drove from our_iconsarray.var titles = (iconSet === "default") ? ['Edit','Remove'] : ['Relieve','Cancel']; this._icons[i]
-
Eq(0)
The
eqmethod is used every bit a filter confronting a jQuery collection in that information technology returns the chemical element with the specified index. Thus, callingeq(0)in the context of_icons[i]method will narrow our selection down to the icon with an index of 0 inside that collection. In other words, the offset icon.var titles = (iconSet === "default") ? ['Edit','Remove'] : ['Relieve','Cancel']; this._icons[i].eq(0)
For more than information on jQuery'southward
eqmethod check the jQuery API -
toggleClass()
Using jQuery's
toggleClassmethod, we'll add and remove classes to our icons, respectively. So, if a specified class is nowadays, it will be removed. Conversely, if a specified class is not nowadays, it will exist added.We'll concatenate the advisable classes for each icon with a space as the
toggleClassmethod accepts multiple grade names every bit a space separated list. Pretty nifty!var titles = (iconSet === "default") ? ['Edit','Remove'] : ['Save','Cancel']; this._icons[i].eq(0) .toggleClass(this._classes.edit + ' ' + this._classes.salve)
Documentation for jQuery's
toggleClassmethod can be found in the jQuery API -
Attr('title', Titles[0])
With our commencement icon's classes now set up, nosotros'll define it's title attribute using the jQuery
attrmethod. We'll set the championship using the appropriate value stored in thetitlearray we created just a moment ago. The array keys for thechampionshiparray match the index of the icon currently selected so the title for this icon is bachelor every bittitles[0].var titles = (iconSet === "default") ? ['Edit','Remove'] : ['Save','Cancel']; this._icons[i].eq(0) .toggleClass(this._classes.edit + ' ' + this._classes.relieve) .attr('title', titles[0])To read upwards on jQuery's
attrmethod, bank check the jQuery API -
Finish()
jQuery's
terminatemethod is used to remove the almost recent filter practical to a collection. By callingfinishhither, we'll be removing theeqfilter from our collection. In other words, we'll exist working with_icons[i] again.var titles = (iconSet === "default") ? ['Edit','Remove'] : ['Save','Cancel']; this._icons[i].eq(0) .toggleClass(this._classes.edit + ' ' + this._classes.salve) .attr('championship', titles[0]) .end()Documentation for jQuery'south
stopmethod tin can be found in the jQuery API -
... the Side by side Verse Same every bit the Showtime!
We'll use jQuery'south eq method again to specify the second icon at present. The second icon volition have an index of one, since indicies are zero based, and as such we'll use
eq(ane)to select it.Post-obit suite with the higher up expression, we'll u.s.a. the exact same methods for the second icon as nosotros did for the first only with the advisable class names and title.
var titles = (iconSet === "default") ? ['Edit','Remove'] : ['Save','Cancel']; this._icons[i].eq(0) .toggleClass(this._classes.edit + ' ' + this._classes.salvage) .attr('title', titles[0]) .end().eq(1) .toggleClass(this._classes.remove + ' ' + this._classes.cancel) .attr('championship', titles[i]); -
Return This
The terminal thing we'll practise here is
return thisso every bit not to break this methods chainability.var titles = (iconSet === "default") ? ['Edit','Remove'] : ['Salvage','Abolish']; this._icons[i].eq(0) .toggleClass(this._classes.edit + ' ' + this._classes.save) .attr('championship', titles[0]) .end().eq(1) .toggleClass(this._classes.remove + ' ' + this._classes.abolish) .attr('title', titles[1]); return this;
Voilà!
Now that nosotros've defined our variable and expression, permit's take look at the unabridged _showIconSet method at present:
_showIconSet: function(i, iconSet){ var titles = (iconSet === "default") ? ['Edit','Remove'] : ['Salve','Cancel']; this._icons[i].eq(0) .toggleClass(this._classes.edit + ' ' + this._classes.salve) .attr('championship', titles[0]) .end().eq(1) .toggleClass(this._classes.remove + ' ' + this._classes.cancel) .attr('title', titles[1]) return this; }, _transformElements: The workhorse method!


In this method, we'll be looping through the editable content in club to get / set an advisable text / html string for that element relative to the type of transformation nosotros're making. Then, we'll simply ready the element's html.
After the loop, as usual, nosotros'll return this!
Arguments
This method takes two arguments, i and blazon.
i, will exist used to select the appropriate jQuery collection from the _editable assortment relative to _iconContainer[i] from the _create method.
The blazon argument simply specifies the type of transformation that's being called. This method handles 3 three types of "transformation":
- Making content editable and storing electric current values for possible retrieval
- Restoring editable content dorsum to its default state with it'south original values
- Restoring editable content back to its default state with new values
As such, type volition either be "edit", "restore" or "update".
_transformElements: function(i, type){}, A Necessary Shortcut...
First off, we'll need to ascertain a variable which references the options.fieldNames array.
It'due south necessary to ascertain this reference within the context of this method so that it will be available to the inner function, $.each, we'll be calling presently.
The fieldNames var will simply be used when making elements editable.
var fieldNames = this.options.fieldNames;
Iterating Through Our Editable Content
Using jQuery's $.each method, we'll iterate through _editable[i]. Nosotros'll pass the empty argument, alphabetize, to $.each. The numeric index of each chemical element in the loop will be assigned to this argument.
this._editable[i].each(function(alphabetize){...}); Variables Within the $.each Method
Inside the telescopic of $.each, we'll ascertain / initialize two more than variables respectively:
-
Html:
Well initialize the
htmlvariable, here, in the scope of$.each. This var will comprise an html string if we're making content editable and a text string if we're updating or restoring content.this._editable[i].each(part(index){ var html; }); -
Self:
Nosotros'll cache the jQuery selector for
this, the selector for the current element in the loop.this._editable[i].each(role(alphabetize){ var html, self = $(this); });
Using a Switch to Get and Ready!
With our variables initialized and defined, nosotros'll now use a switch statement against the type argument in order to determine what exactly we'll exist doing.
-
Example "Edit":
If the case is
edit, we'll be making this element editable. As a result, nosotros'll need to practise three things:-
The text value of the element
First off, nosotros'll define a new variable,
val, asthiselementstextvalue.switch (type){ case "edit": var val = self.text(); suspension; -
Storing the text for later
Using jQuery'due south
$.datamethod, nosotros'll attachvaltothischemical element! The$.informationmethod is a fantastic fashion to associate data with an element. For setting data, we'll need to specify 3 arguments,element,keyandvalue.switch (blazon){ example "edit": var val = cocky.text(); $.data(this, 'value', val); suspension;For more than information on jQuery's $.data method have a look at the jQuery API
-
Defining the
htmlstringLastly, we'll define the
htmlvar as a cord representation of an input element. This cord will be used to both create and inject this chemical element with just 1 phone call to jQuery's html method.We'll set the name aspect of this input past concatenating the appropriate value from the
fieldNamesarray into the html string. This is where we'll use thealphabetizestatement every bit it represents the index of the current element in the loop. And so, if were working with_editable[0]the advisable field proper noun should be stored infieldNames[0]!In like fashion, we'll the concatenate
valinto the string as the input's value aspect.switch (type){ example "edit": var val = self.text(); $.information(this, 'value', val); html = '<input type="text" proper name="' + fieldNames[index] + '" value="' + val + '">'; break;
-
-
Instance "Restore":
If
typeevaluates torestore, we'll but need to retrieve the text for this element.-
Retrieving
$.dataRetrieving $.data is but as simple as setting information technology. We only need to call the $.data method with two arguments,
elementandkey.instance "restore": html = $.data(this, 'value'); pause;
-
-
Example "Update":
If the
typeargument evaluates toupdatenosotros'll define ourhtmlvariable as the updated value from thevalueattribute of this element'sinput.Then, using jQuery's
$.informationmethod over again, we'll update the value we attached to this element and so that it reflects the new value!-
Getting the Inputs Value
Using jQuery'south
attrmethod. nosotros'll define thehtmlvar as the value attribute of the input.case "update": html = $("input", cocky).attr('value'); $.data(this, 'value', html); break;
-
-
Default:
-
Setting the Default:
We'll have the switch default to return in the case that the type argument somehow doesn't evaluate to one of the appropriate strings.
default: render;
-
The entire switch statement
With all of our cases defined, here's a look at the entire switch argument
switch (blazon){ instance "edit": var val = self.text(); $.data(this, 'value', val); html = '<input type="text" name="' + fieldNames[index] + '" value="' + val + '">'; intermission; case "restore": html = $.data(this, 'value'); break; case "update": html = $("input", cocky).attr('value'); $.information(this, 'value', html); pause; default: return; }; Setting the HTML
Using jQuery'due south html method, we'll now fix the string nosotros've defined equally the html for this element.
self.html(html);
Returning Something Useful
With our $.each loop finished, nosotros're now ready to finish this method. We'll practice and then past returning this and so that this method is chainable.
return this;
_transformElements in its entirety
That's it, hither's a look at the completed _transformElements method:
_transformElements: office(i, type){ var fieldNames = this.options.fieldNames; this._editable[i].each(part(index){ var html, self = $(this); switch (true){ case(type === "edit"): var val = self.text(); $.data(this, 'value', val); html = '<input type="text" name="' + fieldNames[alphabetize] + '" value="' + val + '">'; intermission; case(blazon === "restore"): html = $.data(this, 'value'); break; instance(type === "update"): html = $("input", self).attr('value'); $.information(this, 'value', html); break; default: return; }; cocky.html(html); }); return this; }, Deleting elements from the DOM with _removeElements


The _removeElements method will be chosen only when a user has successfully deleted data with an AJAX request. In other words, this method will be a callback to a successful AJAX deletion.
Arguments
This method takes but one argument, i, which will be used to select the appropriate selector for the _elementParent we're deleting.
<strong>_removeElements: function(i){...},</potent> Selecting the Content
First, we'll specify which _elementParent we're removing by using i in square bracket / associative array notation. This will give united states the chemical element with an index of i rather than the jQuery selector. Then, we'll make a new jQuery pick from this expression.
We could but every bit hands use jQuery'southward get or eq methods here without making a new jQuery selection. However, in keeping in line with the coding convention we've been using, allow'south just practice the following:
_removeElements: part(i){ $(this._elementParent[i]) }, For more information on jQuery'southward get method, bank check the jQuery API
Documentation for jQuery's eq method can also be found in the jQuery API
Removing the Content
Using jQuery's remove method, we'll delete these elements from the DOM!
_removeElements: part(i){ $(this._elementParent[i]).remove(); }, Documentation for jQuery's remove method can exist institute in the jQuery API
Returning this
Lastly, nosotros'll return this then as not to intermission the concatenation.
_removeElements: function(i){ $(this._elementParent[i]).remove(); return this; }, _encode: Preparing information for submission!


The _encode method is called just before an AJAX request. Using jQuery's serialize and $.param methods, _encode serializes key / value pairs and returns a url encoded cord.
Arguments
This method takes 1 argument, inputs, which represents a jQuery drove of the elements nosotros desire to serialize.
_encode: part(inputs){...}, Serializing Inputs, the Easy Way!
Using jQuery'south is method, which returns a boolean, nosotros'll cheque the inputs argument against an "input" selector. If nosotros are dealing with inputs, is will render truthful and equally such, nosotros'll then phone call jQuery'south serialize method on this collection. serialize takes a grade or a drove of inputs and returns a url encoded string of key / value pairs.
_encode: function(inputs){ if(inputs.is("input")) render inputs.serialize(); }, For more than information on jQuery's is method, cheque the jQuery API
documentation for jQuery's serialize method can as well be establish in the jQuery API
Serializing Everything Else!
If the inputs drove is not comprised of input elements, we'll build an object literal comprised of primal value pairs representing, sort of, pseudo proper noun and value attributes.
Once we've created this object, we tin pass it to jQuery's $.param every bit an argument. $.param will serialize an array or object and return the url encoded string not unlike the jQuery serialize method.
-
Initializing an Empty Object
Permit's initialize the variable
informationan empty object. Nosotros'll populate this object in a moment equally we iterate through ourinputs.var information = {}, -
Making
this.options.fieldNamesavailableNext, we'll define the variable
fieldNamesevery bit a reference tothis.options.fieldNames. By doing this, nosotros're makingthis.options.fieldNamesavailable to this method's inner function,$.each.fieldNamesalso serves as a sort of shorthand manner to admission theoptions.fieldNamesarray.var data = {}, fieldNames = this.options.fieldNames; -
Looping though
inputsUsing jQuery'south
$.eachmethod, we'll being iterating thoughinputs. Once again, we're passing an empty argument,alphabetize, toinputs. Equally a upshot, the index of the electric current element in the loop volition be assigned toalphabetize. Next up, the logic of our loop!inputs.each(role(index){ });-
Caching
thisFirst, let's cache the jQuery selector for
this, the current element in our loop.inputs.each(function(index){ var self = $(this), }); -
Defining the
cardinalThe variable
cardinalwill represent thenameattribute for this element. The value of key is stored in thefieldNamesarray and it's index within that array is equal to the index of the current element in our loop. Thus,fieldNames[alphabetize]should contain the appropriate field proper name forinputs[alphabetize].inputs.each(role(alphabetize){ var cocky = $(this), fundamental = fieldNames[index], }); -
Fetching the
valueLastly, we ascertain the variable
valas a sort of pseudovalueattribute. We'll use jQuery'southtextmethod to go the text of the electric current element in the loop.inputs.each(function(alphabetize){ var cocky = $(this), fundamental = fieldNames[alphabetize], val = self.text(); }); -
Building the
dataobjectWith our key / value pairs defined, we'll begin populating the object using square bracket / associative array note. We'll set the key for each item as
centraland the value equallyval. The do good of using this blazon of notation, in this particular context, is that we tin can gear up the key with a variable. In literal notation, the variablefundamentalwould be interpreted as the string"key".inputs.each(function(index){ var self = $(this), fundamental = fieldNames[index], val = self.text(); data[key] = val; });
-
-
Returning the Encoded Data
Now that our iteration is complete and the
dataobject is populated, nosotros'll call jQuery's$.parammethod withinformationas its statement.$.paramwill render a url encoded string representation of the object or array passed to information technology.return $.param(data);
For more information on the jQuery $.param method cheque the jQuery API.
The full _serialize method
Here's a look at the complete _serialize method:
_encode: function(inputs){ if(inputs.is("input")) render inputs.serialize(); var information = {}, fieldNames = this.options.fieldNames; inputs.each(function(index){ var self = $(this), key = fieldNames[index], val = cocky.text(); data[key] = val; }); return $.param(data); }, 
Source: https://code.tutsplus.com/tutorials/create-a-dynamic-content-editing-system-with-jquery-ui--pre-13149
0 Response to "How to Read Api Documentation for Jquery Ui"
Post a Comment